How to Connect Your PlayStation VR2 Headset to a PC: Step-by-Step Guide
- By Daniel
- Mar 04,2025
Unlocking the PlayStation VR2 on PC: A Comprehensive Guide
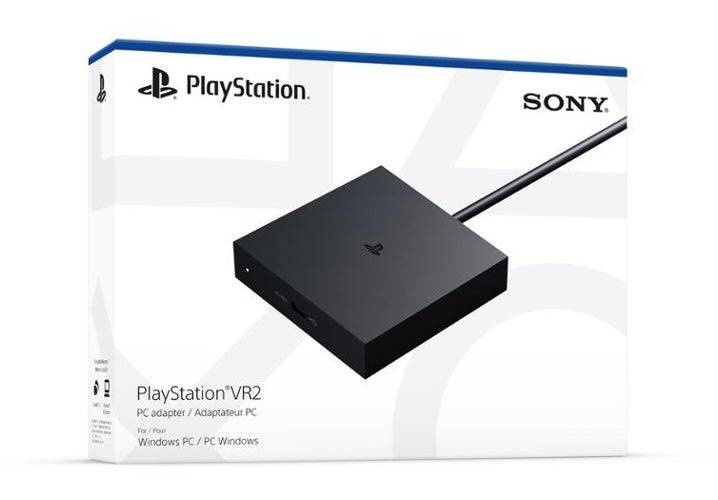
For PS VR2 owners eager to explore SteamVR's vast library, the $60 PlayStation VR2 PC adapter opens exciting possibilities. However, connecting isn't always straightforward. While marketed as plug-and-play, some configurations require additional steps.
Essential Requirements:
Before proceeding, ensure you have:
- PlayStation VR2 headset
- PlayStation VR2 PC adapter (includes AC adapter and USB 3.0 Type-A cable)
- DisplayPort 1.4 cable (sold separately)
- Free USB 3.0 Type-A port on your PC (using a powered external hub is generally acceptable, despite Sony's warning)
- Bluetooth 4.0 capability (built-in or via an external adapter)
- Steam and SteamVR installed
- PlayStation VR2 app installed on Steam
- Two USB-C charging ports and cables for Sense controllers (or a Sony charging station)
PC Compatibility Check:
First, verify your PC meets the minimum specifications on Sony's official PS VR2 PC Adapter preparation page.
Step-by-Step Connection:
-
Install Software: Install the Steam client, SteamVR, and the PlayStation VR2 app from Steam.
-
Bluetooth Pairing: Enable Bluetooth on your PC. On each Sense controller, press and hold the PlayStation button and Create button until the light blinks. Add them as Bluetooth devices in your PC's settings. If using an external Bluetooth adapter alongside a built-in one, disable the built-in adapter in Device Manager.
-
Adapter Setup: Connect the PS VR2 adapter to a USB 3.0 Type-A port, using a DisplayPort 1.4 cable to connect it to your GPU's DisplayPort. Connect the AC power adapter. The adapter's indicator light will turn solid red when powered on. Connect the PS VR2 headset to the adapter's USB-C port.
-
(Optional) Disable Hardware-accelerated GPU Scheduling: For newer GPUs (e.g., Nvidia RTX 40-series), disabling this setting in Windows settings (System > Display > Graphics) might improve stability. Restart your PC afterward.
-
Launch and Setup: Power on the PS VR2 headset. Launch SteamVR, setting it as your default OpenXR runtime. Open the PlayStation VR2 app to update controller firmware and configure your Play Area, IPD, and display distance.
Direct Connection (Without Adapter):
Currently, a direct connection without the adapter is unreliable. While some users with specific 2018-era GPUs featuring VirtualLink and a USB-C port report success, this is not a guaranteed method.
Enjoy your expanded VR gaming experience!
Latest News
more >-

-
-

-

- 2025年最值得期待的电影大片
- 06/16,2025
-